In this tutorial you will get a step by step explanation of how to download and flash emteria.OS onto the RockPi 4B.
 |
|

Note: Currently we only support RockPi 4B versions with internal storage (eMMC). Installing and booting emteria.OS from an SD card is not yet possible with RockPi 4B.
Go to the following section to check if you have a RockPi 4B with internal storage.
Flash the RockPi 4B
- Download emteria.OS through the emteria installer.
Read our tutorial.
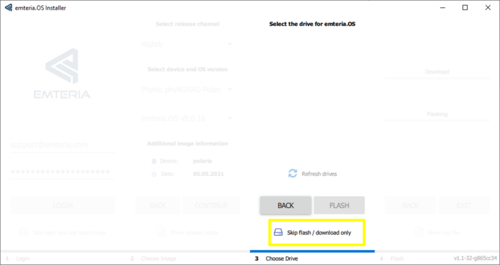
To download the .zip files needed in step 2, select Skip flash / download only.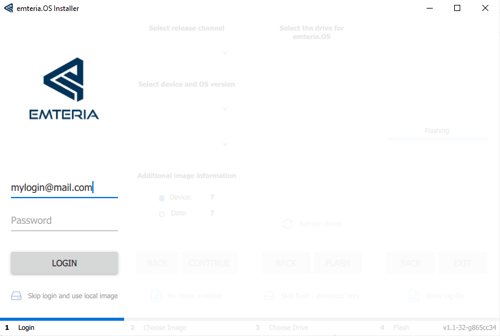
- Unpack all .zip files into one folder.
Location: C:\Users\<adminuser> \AppData\Local\Emteria\Emteria.OS Installer\rockpi4b-v11.x.x
Contents:
– gpt.zip
– tools.zip
– package.json
– config.json - Run the RKDevTool, as you will need it in step 9. You can find the AndroidTool.exe file to run RKDevTool in the downloaded .zip files.
Note: please install the necessary drivers, see 3.b.
- How to find the file:
1. Go to: C:\Users\<adminuser>\AppData\Local\Emteria\Emteria.OS Installer\rockpi4b-v11.x.x
2. Unzip tools.zip
3. In the tools folder unzip AndroidTool_Release_v2.69_gpt.zip
4. Double click AndroidTool.exe to run the program -
Download and install the necessary drivers; you can find the tool requirements here.
- How to find the file:
- Disconnect the power USB supply cable.
- Remove all bootable media.
E.g. SD card or mmc. - Connect the USB male-A to male-A cable to the top left USB port.

- Connect the USB cable to your PC or laptop.
- Connect the power USB while holding the middle button pressed.
 .
. - Start RKDevTool.
Note: Tested with v2.69.
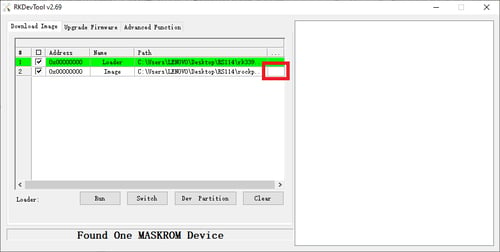
If step 7 is done correctly the message No Device Found will change to Found One MASKROM Device.
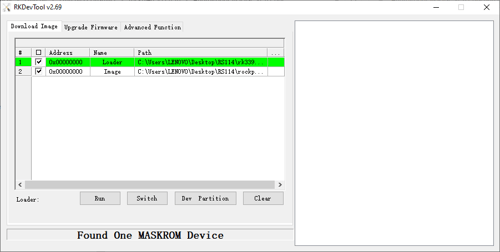
- Choose rk3399_loader_v1.20.119.bin loader.
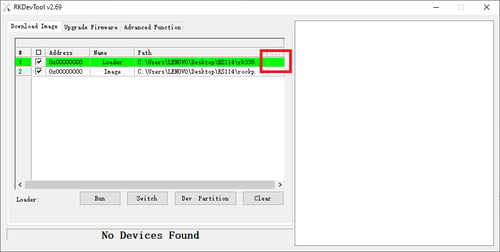
- Choose gpt.img file.
- Click Run.
- When the process was successful, you should see the following:
.png?width=500&name=RockPi-step-12%20(1).png)
Serial console
To set up the connection to the RockPi 4B+ Serial console, you can follow the detailed explanation here. Find necessary drivers here.
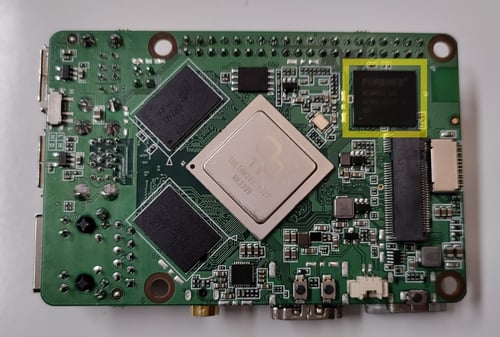
How can I check if I have a RockPi 4B with internal storage (eMMC)?
On the picture below you can see the backside of a Rock Pi 4B with the internal storage (eMMC) marked in yellow.