Article overview
Flashing the RPi CM4IO
Troubleshooting
This tutorial will show you how to prepare and emteria.OS on the Raspberry Pi Compute Module 4 IO Board.
Flash the Raspberry Pi Compute Module 4 IO Board
- Don’t power up yet.
- Download and install the required drivers on your PC (if not already done).
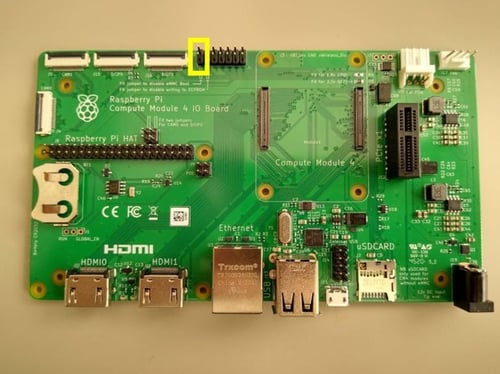
- Set jumper to prevent boot from emmc.
Use jumper J2 by setting it to the disable eMMC boot position to prevent the IO board from booting.
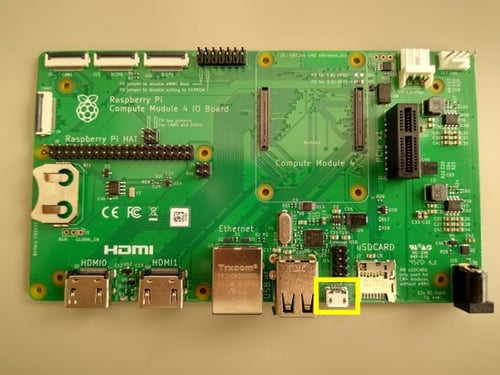
- Connect the IO board to your PC through the micro USB slave port.
Plug-in the micro USB cable into the USB slave port marked as J11.
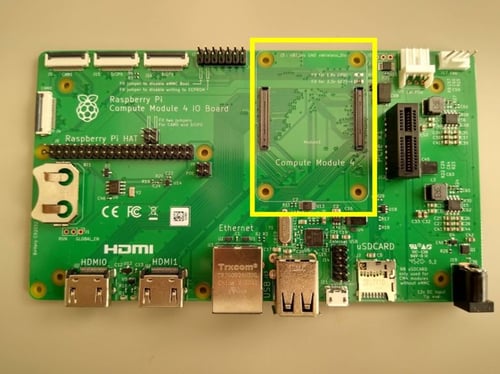
- Plug-in the Compute Module 4 (if not already done).
Add the Compute Module in the provided slot.
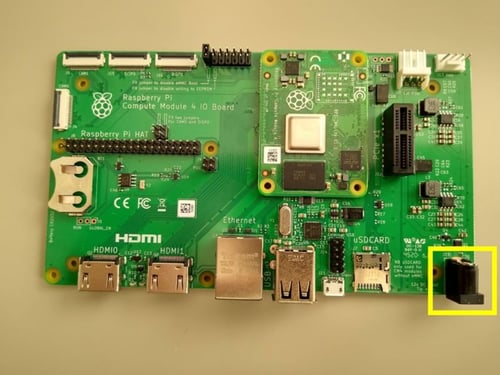
- Power up the IO board
The power supply is marked as 12V DC Input.
- Run the RPiboot.exe on your PC. Installed in step 2 along with the drivers.
The eMMC should now appear in Windows like a USB stick. - Open the emteria installer and choose a Raspberry Pi 4 release (>11.0.13) of your choice.
Read the tutorial for the installer.
-
Remove the jumper set in step 3 and the micro USB cable from step 4.
- Power up your device and enjoy emteria.OS.
Note: To enable ABD over USB for the micro USB port, do the following:
Remove dtoverlay=dwc2,dr_mode=host from the config.txt file. Note that this will disable the standard USB ports.
The Raspberry Compute Module 3 has a lite edition without eMMC storage. Therefore, for these boards the RPiBoot will not be needed. The lite editions support booting from an SD card. You can flash emteria.OS onto the SD card, insert it into the IO board and run the OS on your device.
Troubleshooting
Running the official Raspberry Pi Touchscreen
For the CM4IO Board the device tree needs to be adjusted depending on the DSI/CSI periphery connected. Read the official documentation for more info.
Depending on if your display is connected to display port 0 or 1 you need:
https://datasheets.raspberrypi.com/cmio/dt-blob-disp0-only.bin
https://datasheets.raspberrypi.com/cmio/dt-blob-disp1-only.bin
Add the appropriate device tree as dt-blob.bin to the boot partition.
Read our tutorial on how to access and edit the config.txt file.