Note: Supported are x86 devices with Intel Core i3-, i5-, i7-, and i9-CPUs starting with the 8th generation (Coffee Lake).
The emteria.OS release for x86 is based on Intel's Celadon Project, which accelerates development, improves efficiency, and enables reliable scaling.
Flash an USB flash drive:
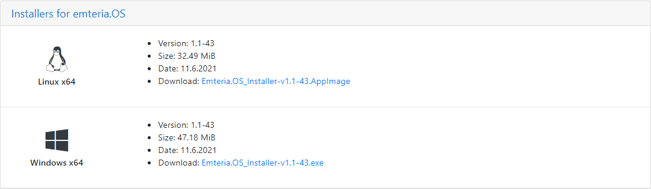
- Download emteria installer.
-
Read our tutorial on where to find and download the installer for your OS.
- Choose a USB drive with a size of 16 GB to 128 GB for the installation of emteria.OS
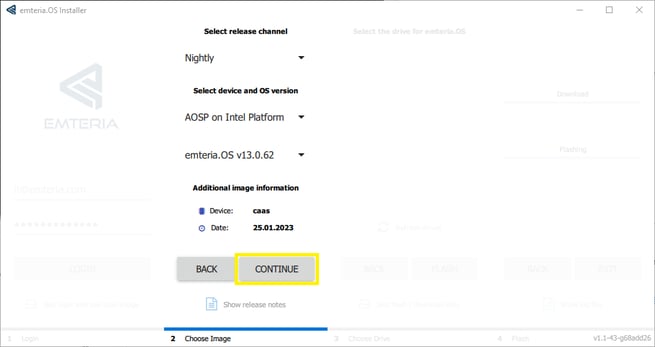
- Follow these steps to flash emteria.OS:
Caution: all data on the USB drive will be removed first!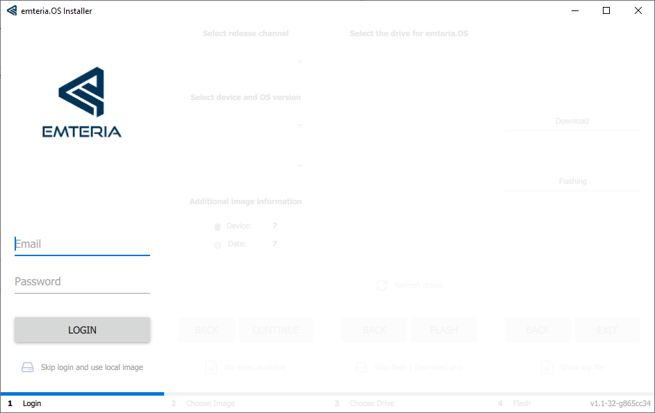
- If you were provided configuration files, than reconnect the USB drive when the installer finishes and mount /boot partition. Copy loader Folder and .ini files on /boot. Confirm replacing files.
- Disconnect USB drive and connect it to your Intel x86 device and power the device.
Note: We only support one HDMI display on NUCs; usually HDMI port 2. If the display does not show any Linux kernel output nor boot animation / Android screen, please try the other HDMI out.
Device preparation:
- Plug the flashed USB drive in any USB port of your target x86 device
- Power the device and enter the BIOS options
- Select the USB drive to boot from first
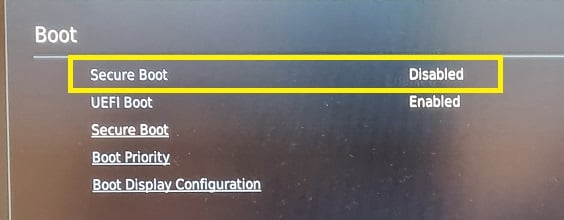
- In boot options disable "Secure Boot":
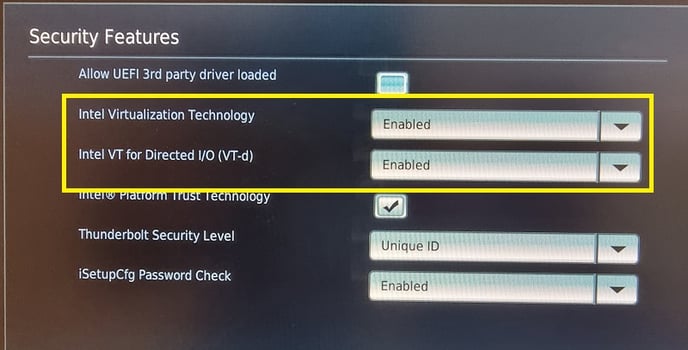
- In "Security Features" enable "Intel Virtualization Technology" and "Intel VT-d":
- Save your settings and reboot
- The installation is performed automatically, afterwards the device is shutdown.
- At this point you can disconnect the USB drive and reboot the device. An emteria OS UEFI entry should have been created and selected as first booted, so that Android starts automatically. If this is not the case, check boot order.
- First boot can take longer as usual as the userdata is expended and preinstalled apps are unpacked, installed, and optimized.
Note: Some devices can fake a display. Look for options similar to "Virtual Display Emulation" in BIOS. When enabled they can cause boot halts, freezes, or flickering.