Enable multi-display support for Raspberry Pi 4B (RPi4)
In this article, we will guide you on how to enable multi-display support on Android 14 for Raspberry Pi 4.
Steps to enable multi-display support:
Multi-Display Mode in Android works differently compared to our regular computer. Android is not designed for several external monitors, so each input device is mapped to a specific monitor without the ability to switch to a different monitor.
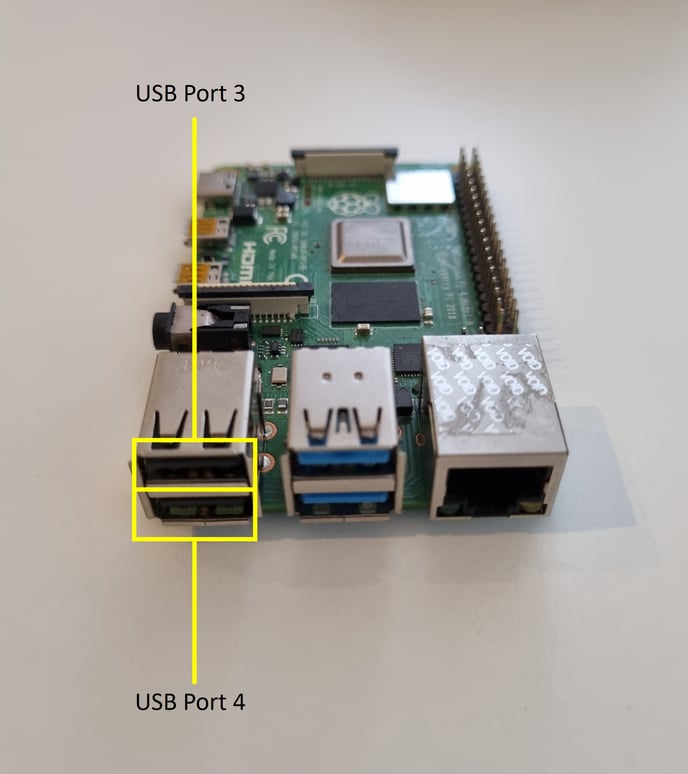
To be able to control two displays, we added a USB Port to HDMI port HID/Touch event routing. This means:
- USB Port 3 is routed to HDMI Port 0, and
- USB Port 4 is routed to HDMI Port 1.
Warning: The routing also applies to single display usage. Which means, if a HID is connected to USB Port 3 and a single display is connected to HDMI Port 1, instead of HDMI Port 0, all HID events will be dropped.
Step 1 - How to activate Developer options
To access Developer options on your Android 14 device, follow these steps:
- Access the App Drawer on your device by simply swiping up from the bottom of the home screen.
- Open Settings.
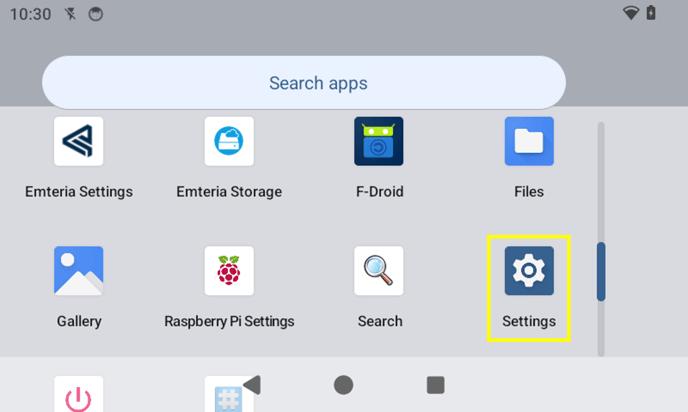
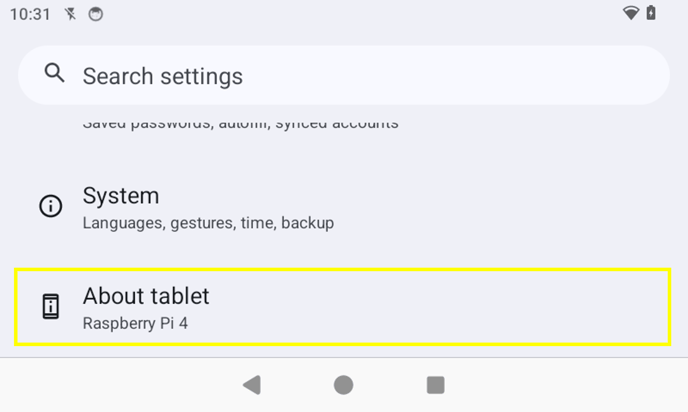
- Scroll down and select About tablet.
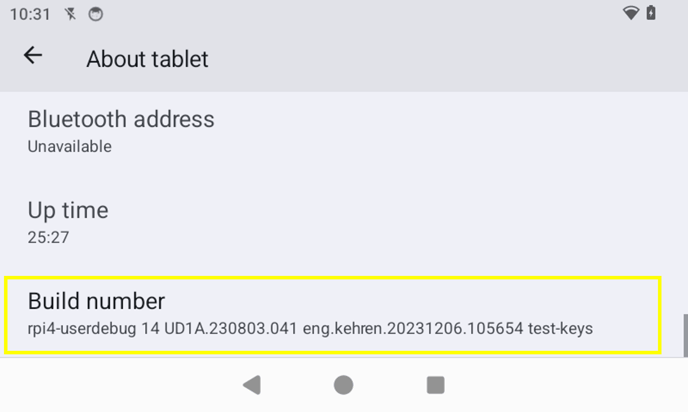
- Search for Build number and tap it repeatedly until you see a message confirming that you are now a developer.
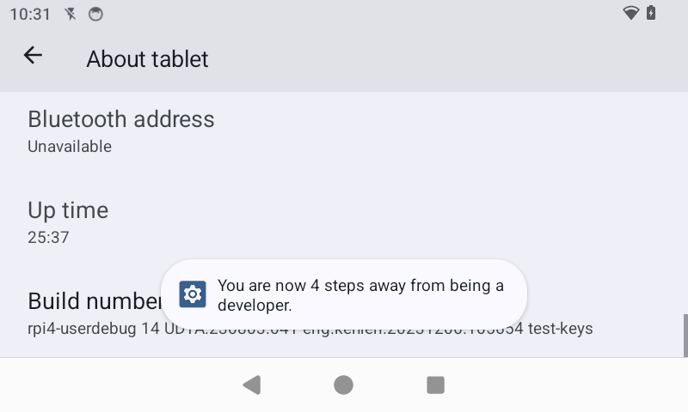
Once you have enabled Developer options, you can proceed with enabling multi-display support.
Step 2 - How to enable multi-display support
- Go into Settings and choose System.
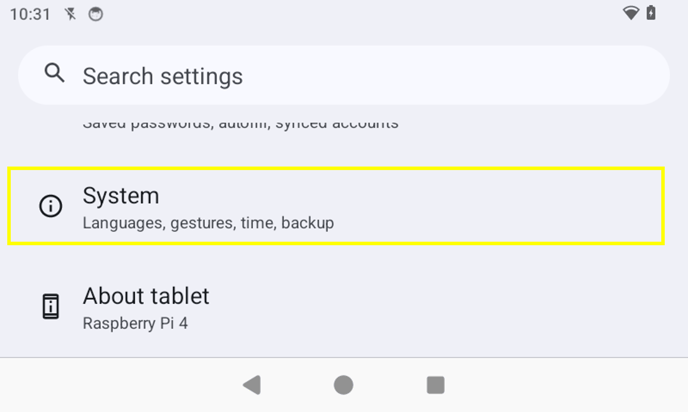
- Scroll down and find Developer options.
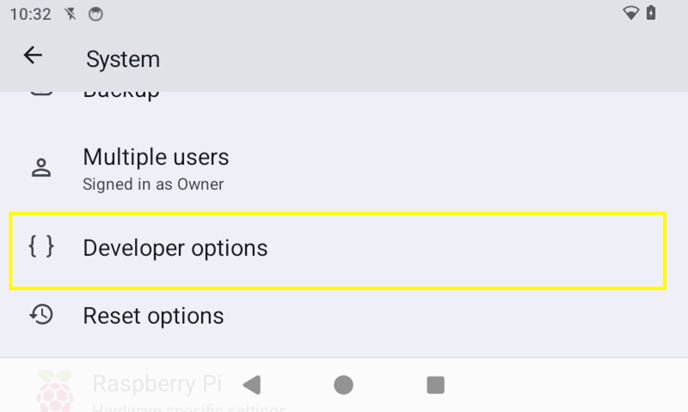
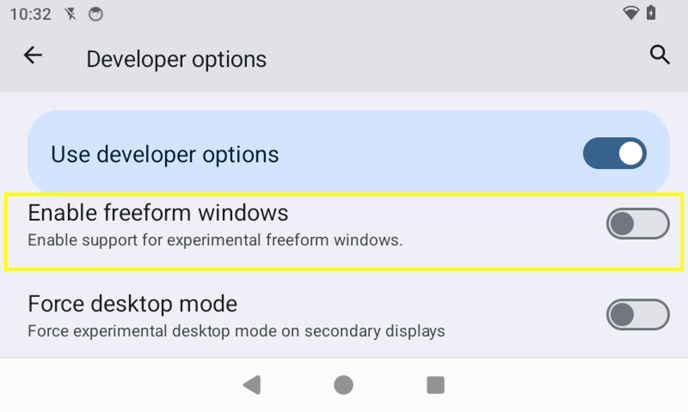
- Continue scrolling down until you locate Force desktop mode and toggle it on to activate multi-display support.
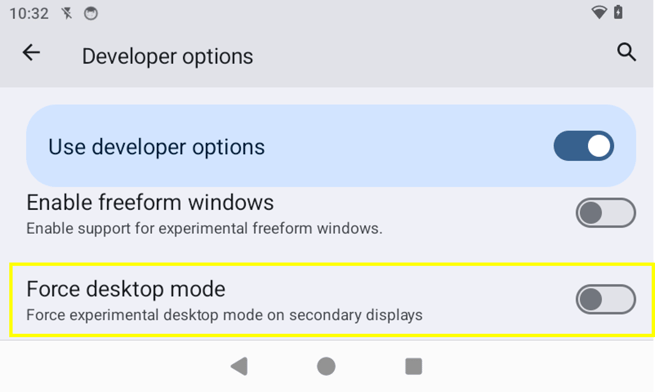
- Enable freeform windows (optional) to open apps in separate windows instead of full-screen mode. This feature is similar to how it works on a PC, giving the flexibility to move the windows around and resize them to a preferred size.
Note: The changes will be implemented after a device reboot. Reboot the device via the Shutdown app on the device, or send a Group Command via MDM.