This article describes the required steps for the initial configuration and usage of the built-in VNC server.
Note: Make sure your device has a working network connection.
There are three options to activate the VNC server.
Option 1: Enable through Device Provisioning
For this read our introduction to Device Provisioning. See the section under System Connectivity.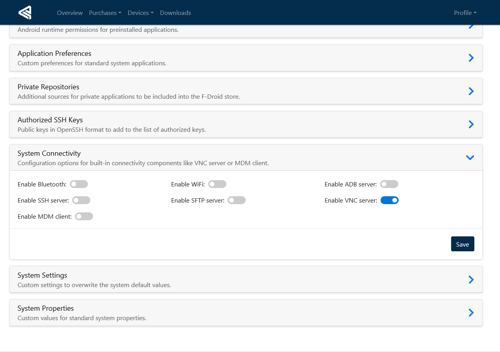
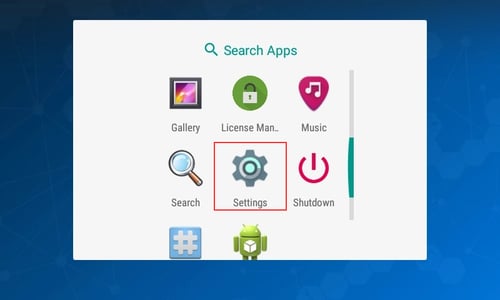
Option 2: Enable it on your Device
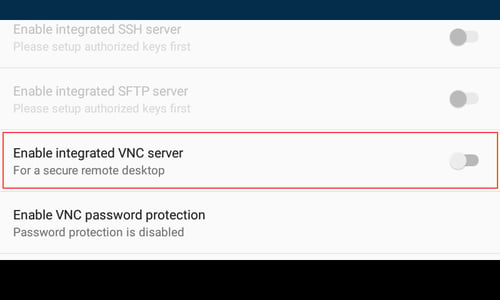
- Navigate to Settings from the App Drawer.
- Scroll down to the Device section and open Emteria Settings.
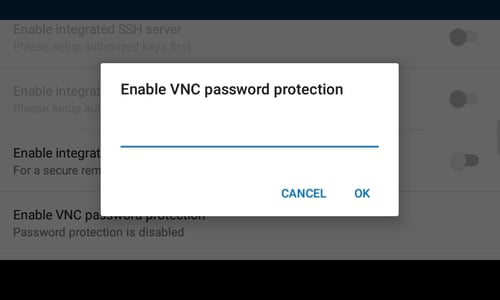
- If you want to set password protection for the VNC connection then click on Enable VNC password protection and set the desired password before you enable the integrated VNC server.
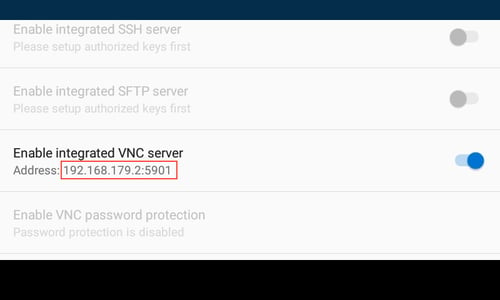
- Toggle on the right to Enable integrated VNC server.
- Now you will see the ip address and port for the direct connection over VNC to your emteria.OS device.
Please note: After the VNC server is turned on, the on-screen keyboard will be no longer shown on the screen.
To enable the virtual keyboard, see the section Enable virtual keyboard when using VNC.
Option 3: Enable through MDM
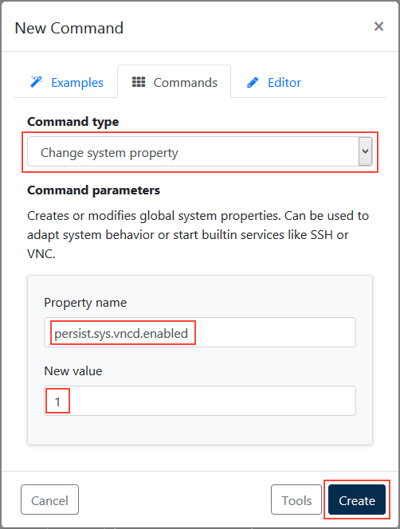
- Open the tool for creating commands in the MDM.
- Go to the Commands tab and select the command type Change system property.
- Type the following information into the corresponding fields and click on Create:
Property name: persist.sys.vncd.enabled
New value: 1
Note: For more information read our introduction to creating and sending commands.
Read our tutorial on how to connect your device to a VNC Client (Viewer).
Read our tutorial on how to enable virtual keyboard when using VNC.