A custom boot animation lets your company brand all its Android devices, regardless of whether that device is a point-of-sale device, kiosk, or signage device.
In this tutorial, we're going to cover how to make your custom boot up animation Android work. You’ll learn how to set up Android custom boot animation without root, and whether you can use an Android boot animation app to replace the standard Android logo boot animation.
What is a boot animation in Android?
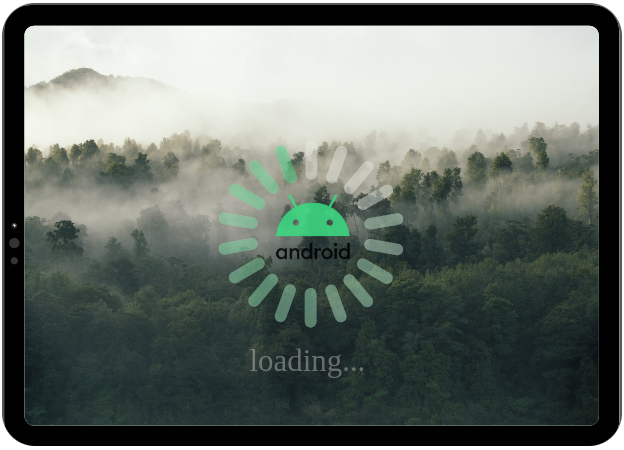
An Android boot animation is the animation users see on the boot screen when the device starts. This provides a visual representation of progress, so the user does not feel their device is hanging while it boots up. It is possible to use a custom boot animation for Android devices allowing users to personalize their experience.

Image: emteria's custom boot animation Android
Can I change the boot animation on Android devices?
You can change to a custom boot animation on Android, with or without root access. You simply need to create an animation file using the appropriate file structure, zip this file, and then install it on your device using either root access or Android ADB (Android Debug Bridge).
How to create a custom boot animation for Android
Fortunately, how to create custom boot animation for Android is not as difficult as one might think.
The boot animation in Android consists of a sequence of images saved frame by frame as image files within a zip file. Along with the images, there is also a text file (desc.txt) stored responsible for specifying how the stored images are animated. The images are usually in either jpg or png format.
The final zip file structure looks something like this:
|
bootanimation.zip |
Be aware that the structure of the file is important. It defines in which order the separate parts of the final boot animation are shown and which parts are looped. The images within the folders should be numbered sequentially starting from 000.
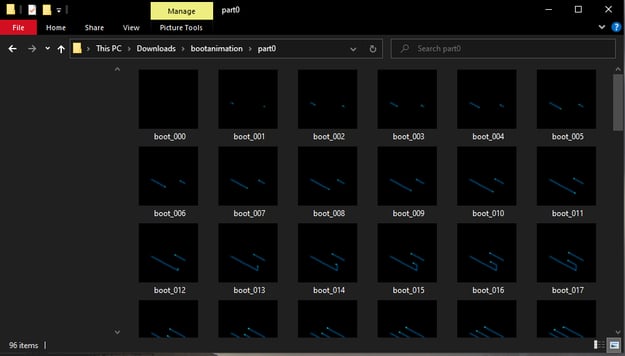
Images: emteria example of boot animation Android files | Source: Windows / Screenshot
The text document desc.txt is also saved in the files. This text file specifies the resolution, frame rate, and number of loops for the animation to be played.
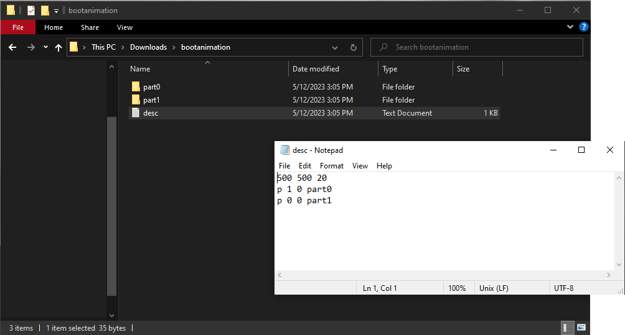
Image: emteria example of boot animation Android desc.text file | Source: Windows / Screenshot
The desc.txt file has the following structure:
|
[width] [height] [frames per second] Etc. End off with an empty line. |
Usually, there are no more than three lines, it depends on how many parts your animation has.
The last line must be empty.
Let's use the following example desc.txt file:
|
800 480 30 |
In the example, we're stating that the animation images:
|
800 480 30 |
- Are 800 px in height,
- 480 px in width, and
- Must have a frame rate per second of 30 FPS.
The line parts mean:
|
800 480 30 |
- Type - Under type p, the custom boot animation Android cuts abruptly when the OS has loaded. But type c lets the custom boot animation Android finish to the end. For very long animations, this might give the impression of a slow boot time.
- Loop count - How many times to loop through the images in this folder. Important: If you set the loop value to 0, it will loop infinitely until boot is complete.
zip -0qry -i \*.txt \*.png \*.wav @ ../bootanimation.zip *.txt part*
- Pause - For how many frames to pause the last image in this folder. If we pause for 15 frames, and the frame count is 30 FPS, we're pausing for 0.5 seconds.
- Folder - the name of the folder this series is in.
- Background color - Defaults to black if omitted, otherwise contains the hex number of a color.
Android Jelly Bean (version 4.4) animations only supported the "p" type. But later versions, such as Android lollipop boot animation and above support type "c."
Important: The custom boot animation in Android consists of a single zip file with the precise name bootanimation.zip. Make sure no other files are included in the bootanimation.zip file.
Several tools exist to zip the images and text document into the final bootanimation.zip file.
Be aware to store the zip file without compression by using:
zip -0qry -i \*.txt \*.png \*.wav @ ../bootanimation.zip *.txt part*
Create the images for a custom boot animation Android
Software exists for creating custom boot animation Android by converting videos into the necessary JPG and PNG files. You can also convert GIF files for implementing the custom boot animation in Android.
If you don't have a specific video you'd like to convert, you can use static images, or look for ready-to-use boot animations. There are plenty of Android boot animation downloads around to choose from. Several forums presenting their own opinion of the best custom boot animation Android. However, be alert where you download the files so that you don't install anything malicious on your device.
How do I install a custom boot animation?
To install a custom boot animation, there are three options, two of which require root access: copy the bootanimation.zip to the system/media folder via root file explorer or flash with the ROM. The third option is to use ADB to copy the file to the data/local folder.
How to change boot animation in custom ROM?
If you're using an Android custom ROM, the best way to install a custom boot animation for Android is to copy the bootanimation.zip file in the system/media folder of the ROM. Then flash the custom ROM to your Android device.
Steps to install bootanimation.zip with root access
To add the custom boot animation Android to your Custom ROM, you simply have to set the PRODUCT_COPY_FILES directive in your Makefile when compiling your custom ROM.
The exact instruction is:
|
PRODUCT_COPY_FILES += \ |
Benefits of a custom boot animation used in your custom ROM
The benefit of an Android custom ROM is that the boot animation is available as soon as the device is flashed. With all the other options, you have to boot the device up twice, to see the changed animation.
Using a custom ROM means you can flash your created Android image, which includes your custom boot animation Android, to many devices and ship them to your customers.
How to install boot animation using ADB?
You can install a custom boot animation Android file to your device by using ADB to send commands to the device and copy the bootanimation.zip file to the data/local folder. Let's look at the steps to do this.
Steps to install bootanimation.zip without root access
First, you need to install ADB on your computer.
Open a command prompt (cmd.exe) and then navigate to the folder that contains your bootanimation.zip file.
First, connect the device to your computer, either by cable or using ADB if you are on the same local network. To connect using ADB, use the following command:
|
adb connect <IP> |
Then type in the following command:
|
adb push bootanimation.zip /data/local |
Then run:
|
adb reboot |
To revert to the old animation, simply delete the bootanimation.zip file from data/local.
In the end, reboot the device and check if the animation works. (You need to do this regardless of the installation option you choose.)
There you go! Installing a custom boot animation on Android is that easy.
Boost your brand identity with your Android boot animation
A custom boot animation Android provides a valuable opportunity to enhance the user experience or to reinforce a company's brand identity across a range of devices. Following the above steps, you can create and install unique boot animations tailored to your needs, ensuring a cohesive and visually appealing boot-up experience.
Build unique Android products, manage them remotely
See why emteria is the chosen Android™ customization & management platform for product builders — build Android products based on your requirements with all enterprise features you need.
Table of contents