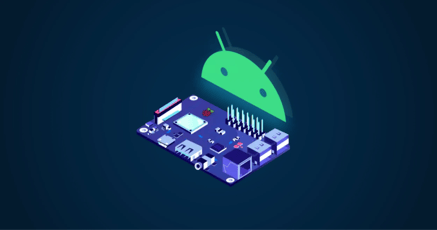
We are happy to announce that the emteria Android 13 ROM for Raspberry Pi 4 is now available for download in the official Raspberry Pi Imager.
The Raspberry Pi Imager is a quick and easy way to install different operating systems to a microSD card for your Raspberry Pi. The Imager can be downloaded and installed to your computer from the official Raspberry Pi website. It gives you access to a variety of generic, gaming and purpose-specific OS images. With emteria, the Imager now officially offers Android ROMs.
This new cooperation brings a set of cutting-edge features, designed to provide a seamless Android experience on your Raspberry Pi 4 devices. Unlock the potential of Android on your Raspberry Pi and explore a world of new possibilities with emteria!
[Skip to full installation tutorial]
Out now
Since first publishing this article Android 14 has been released for Raspberry Pi 4 & 5. In addition to that Android 15 is now available for Raspberry Pi 5.
.png?width=1080&height=1080&name=Android%20for%20RPi(2).png)
What to expect from emteria Android OS
Here are some highlights you can expect from emteria's Android 13 OS:
Enhanced performance
Thanks to improved performance optimizations tailored specifically to Raspberry Pi 4 your Android applications will run smoothly on your Raspberry Pi 4.
Supported peripherals
Take full advantage of a wide range of supported peripherals, expanding the capabilities of your projects out-of-the-box. Emteria supports HDMI and DSI displays, including the official 7” touchscreen, the new Camera Module 3 and more peripherals of your choice [full list].
Android 13 features
Benefit from the latest Android features, including enhanced security, more personalization options, and improved media output.
Customization and flexibility
Customize the Android experience, change branding settings, use Kiosk mode and explore the vast selection of possible use cases for your Android-based Raspberry Pi.
Security and update support
emteria’s Android OS will receive functional updates and security patches to keep the functionality and security of your Pi up-to-date. The comprehensive update infrastructure ensures that all devices stay updated through Over-the-Air updates no matter where they are.
Remote management
Monitor and control your devices remotely with built-in VNC, SSH, screen mirroring options, as well as with emteria’s powerful device management system.
No costs
emteria’s Android Starter plan is free forever for all the hobbyists, makers and professional product builders out there.
To get started with emteria's Android 13, head over to the official Raspberry Pi Imager and follow the easy installation process.
How to install Android OS on your Raspberry Pi 4
Follow the simple steps in this tutorial to get your Raspberry Pi up and running with the new Android OS quickly and easily.
1. Download and install the Raspberry Pi Imager
Visit raspberrypi.com/software and navigate to the Install Raspberry Pi OS using Raspberry Pi Imager section. Download the version suitable for your operating system (Windows, macOS, or Linux). Once downloaded, run the installer and follow the instructions to complete the Imager installation.
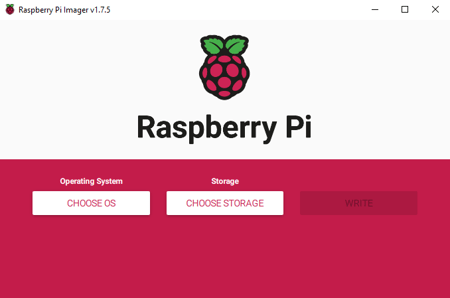
2. Insert your SD card and launch Raspberry Pi Imager
Take your SD card and insert it into your PCs SD card slot or external SD card reader. Open the Raspberry Pi Imager that you installed in Step 1. If prompted, grant any necessary permissions for the application to run.
Source: Raspberry Pi Imager / Screenshoot
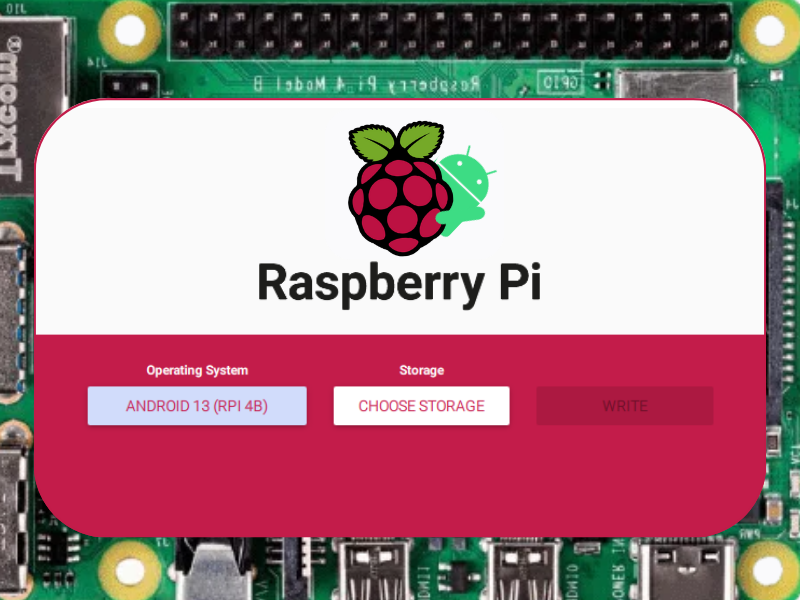
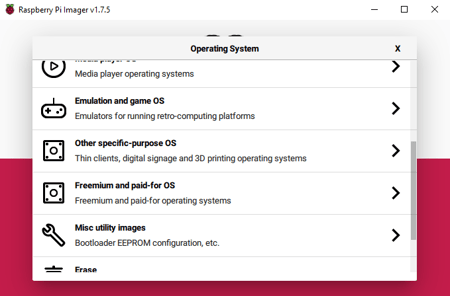
3. Select the operating system
In the Raspberry Pi Imager, you will see a list of available operating systems. These include various official Raspberry Pi OS versions as well as third-party options.
Opt for the Freemium and paid-for section.
Source: Raspberry Pi Imager / Screenshoot
Choose emteria Android OS by clicking on it.
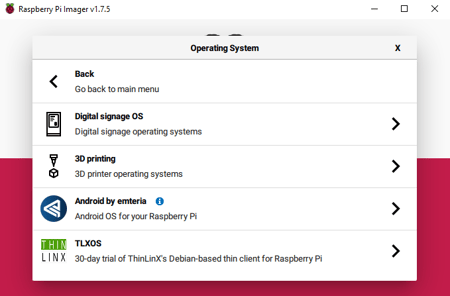
Source: Raspberry Pi Imager / Screenshoot
Pick the Android 13 image matching your Raspberry Pi 4B.
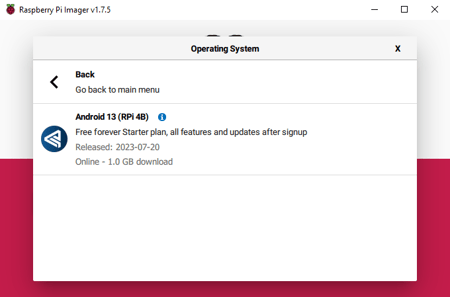
Source: Raspberry Pi Imager / Screenshoot
No credit card is required and there are no hidden costs for using emteria’s Android now or in the future.
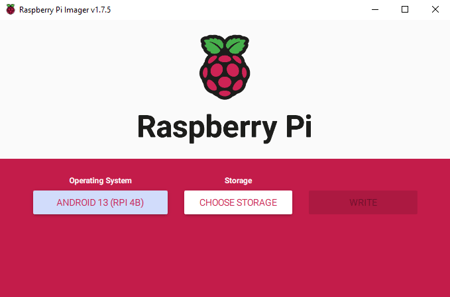
4. Choose the SD card
Click on Choose SD Card. A window will appear displaying the available storage devices. Select the SD card you inserted in Step 2.
Source: Raspberry Pi Imager / Screenshoot
5. Write the image to your SD card
Once you have selected the operating system and the SD card, click on Write. A confirmation dialog box will appear, warning that all data on the SD card will be erased. Double-check that you have selected the correct SD card and confirm.
6. Wait for the write process
Raspberry Pi Imager will now start writing the selected Android for Raspberry Pi image to the SD card. This takes a few minutes, depending on the size of the image and the speed of your SD card and computer. Please be patient and do not interrupt the process.
7. Verification
After the write process is complete, Raspberry Pi Imager will automatically verify the written data to ensure it matches the original image. This verification step helps to ensure a successful installation. Do not remove the SD card until this step is complete.
8. Insert the SD card into Raspberry Pi
Once the verification process is finished and the success message is displayed you can safely eject the SD card. Take it and insert it into the SD card slot on your Raspberry Pi board. Make sure the Raspberry Pi is powered off before inserting your SD card.
9. Power on your Raspberry Pi
Connect your peripherals (keyboard, mouse, display, power supply, etc.) to your Raspberry Pi. Finally, power on the Raspberry Pi. It will boot from the SD card with the newly installed Android OS in place.
.png?width=450&height=338&name=MicrosoftTeams-image%20(19).png)
Image: emteria Android 13 OS on Raspberry Pi 4B.
10. Device set-up and activation to use all emteria features
During the initial device set up the system prompts you to activate your device to get access to the full set of emteria enhanced settings and features for Android 13.
Use your laptop: Visit the emteria website and Register for a free emteria Device Hub account. Redeem your free Starter plan including three subscriptions. No credit card is required!
Here’s how:
How to register for a new account
How to get a free starter subscription
Back on your Raspberry Pi: Choose Continue with emteria account to activate your device easily. Provide the credentials you just used to sign-up and login to your emteria Device Hub account.
Here’s how:
How to activate your device with your emteria account
This step is optional. Please keep in mind that without registration features like remote device management and OTA updates are not available.
Congratulations! You have successfully used Raspberry Pi Imager to install emteria’s Android 13 image on your Raspberry Pi.
Run Android 13 on your Raspberry Pi 4B
We have gathered everything you need to know to successfully run Android on your Raspberry Pi.
Full tutorial including FAQs
Use Android for your Raspberry Pi projects today
We are excited to contribute to the Raspberry Pi experience and thank the team for their commitment to bring Android support to the Raspberry Pi community.
We cannot wait to witness the incredible projects and innovations that will emerge as a result of this partnership. Share your creations with us using the hashtag #AndroidonRaspberryPi.
Discover the great potential of Android 13 on your Raspberry Pi. Update your devices today, explore new features, and embark on exciting projects!
Happy tinkering!
Out now Android 15 for Raspberry Pi 5
Save your free Android OS plan with all features and no time limit — build products with Raspberry Pi 5.
No credit card required.

Table of contents