Few people could’ve guessed in 2008 that Android would become the force it is today. The Android OS has outgrown its initial purpose to just power up smartphones. It now powers up TVs, infotainment systems, outdoor displays, point-of-sale devices, and dozens of other items.
Few people know that Android was already in development long before Apple’s iPhone was released. The OS was actually initially intended to improve the digital camera experience, and the wide use of Android in IoT devices these days echoes that original intent. In 2005, Google acquired the company that had been developing Android, but Google worked on Android in secret until after the iPhone was released in 2007 when it finally announced that it intended to release its own smartphone OS to compete with the iPhone.
The Android market share now dwarfs iOS by leagues and stands at over 70% of the market! Four billion consumer devices are powered by Android today, and over 12 billion professional devices have the potential to be powered by Android.
What is the Raspberry Pi?
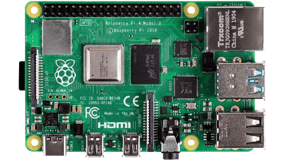
The Raspberry Pi is another force of nature—a $5 - $35 computer that can sit in your pocket. It doesn’t come with an OS, but when did that stop anybody?
Although the Raspberry Pi can trace its history back to developments in the 1980s, the Raspberry Pi device as we know it today was officially launched in 2012. Since then, more than 38 million devices have been sold, making the Raspberry Pi the most popular single board computer (SBC) in the world, and one of the most popular computers in general.
The Raspberry Pi was created by the Raspberry Pi Foundation which had been founded to “inspire the next generation of programmers” and to teach children about computers. However, in a professional context, the Raspberry Pi has been mostly successful for prototyping and, lately, in the development of embedded solutions. Co-creator Eben Upton, a chip architect, had no idea when creating the device that it would become so popular, according to ZDNet.
Can you run Android on a Raspberry Pi?
It’s up to the owner of a Raspberry Pi to choose what OS to put on there. Linux has been the goto OS of the past, but modified versions of Raspberry Pi Android are becoming increasingly more popular.
The Raspberry Pi runs its OS from an SD card. So, whatever OS you choose to use, just install it on the SD card and then stick it into the Raspberry Pi.
Android for Raspberry Pi does not work “out of the box.” To get a working Android OS on Raspberry Pi, tweaks need to be made because Raspberry Pi and Android don’t work natively together. Nevertheless, once the initial obstacles have been overcome, together they form the basis for a wide range of applications in the embedded sector.
Why choose Android on Raspberry Pi 4?
To run Android on Raspberry Pi, you would need a robust Android version that is regularly updated and actively developed. There are versions in the wild out there, but the best way for running Android on Raspberry Pi is to go with a tested system.
The Lineage OS Raspberry Pi 4 version is a popular one created by open-source developer KonstaKANG. But it is not available for commercial use.
A better option for Android Raspberry Pi 4 is emteria’s actively-developed embedded Android OS which can be downloaded from the emteria website after registering on it. This version of Android for Raspberry Pi 4 is free to download and is actively maintained by a strong team of developers. Emteria’s version of Android on Raspberry Pi 4 allows installing apps for both personal and commercial use.
In case you are looking for other Raspberry Pi Versions, emteria also provides Android on Raspberry Pi 3 b+.
The MagPi magazine once called emteria OS the “first proper Android release” for the Raspberry Pi.
By running Android on Pi 4—sometimes referred to as RPI 4 Android —you immediately get the sophisticated touch screen support needed by so many of today’s devices. This is especially true for customer-facing embedded devices, such as kiosk terminals or POS-systems.
Raspberry Pi Android: What you’ll need
To install Android OS for Raspberry Pi 4, you’ll need the following items:
✔️ Raspberry Pi 4
✔️ Micro SD Card
✔️ Keyboard
✔️ Mouse
✔️ Screen
✔️ Power Supply
✔️ Ethernet Cord or WiFi dongle
We are going to show you how to install emteria’s Raspberry Pi 4 Android OS. Emteria offers a Raspberry Pi 4 Android 11 version, as well as Android 10 on Raspberry Pi 4.
Emteria’s Raspberry Pi Android takes only a few simple steps to install.
How to install Android on Raspberry Pi 4
Installing Android on Raspberry Pi 4 is a simple task if you choose the right tools. In this section, we’ll walk you through putting Android on Raspberry Pi 4 and get you up and running with your new OS in no time.
Register with emteria to download Raspberry Pi Android OS
To get Raspberry Pi running Android, the first step is to create an account on the emteria website so that you can download the appropriate version of Android that has already been tweaked to work on Raspberry Pi 4.
Once you are on the emteria website, click “Start for Free” in the top right-hand corner to get started with Raspberry Pi Android. You will receive a free starter plan for your first 3 devices.

Next, you will be taken to a registration page where you must type in your email address.

After this step, you’ll be sent an email to confirm your email address. Click the link in the email to finish registering your account to download Raspberry Pi Android.
You will be sent to a screen to fill in your account details, including a strong password, your full name, your address (optional), and your intended use of the emteria.OS (business or personal).

If you registered for emteria Device Hub and confirmed your email address, you should have received a code to unlock your free starter plan. Follow the steps to learn how to redeem your personal code to unlock your emteria free starter plan.
Download the Raspberry Pi Android installer
To start running Android on Raspberry Pi 4, we will need to download the emteria Raspberry Pi 4 Android installer.
Because emteria was designed as a universal embedded Android version that can be installed on different hardware configurations, there is only one installer necessary for a variety of devices that need Android to run on them. Although tweaks are always necessary for custom-built devices, Raspberry Pi 4 support comes out of the box.

Install Android on Raspberry Pi 4
After downloading the appropriate Raspberry Pi Android installer above, double-click it and run it on your computer.
You will be prompted to log into your emteria account. Type in your email address and password. Then click the login button.
You will be taken to a screen that asks you to select your target device. You should select Raspberry Pi 4.
You will then be prompted to select the emteria.OS version of Android you’d like to use. Select the latest stable one.
After clicking “Continue,” you will be prompted to select the drive to write the Android image to—i.e., where your SD card is located.
Writing the image for Android on Raspberry Pi
The emteria software will write an Android image to an SD card that will serve as the OS for running Android on Raspberry Pi 4.
When prompted, select the drive that has your SD card on it. To get your Raspberry Pi Android OS, click “FLASH.”
This step takes some time to complete because the appropriate Android on Raspberry Pi version needs to be downloaded from emteria’s servers. After it has completed downloading, the Android for Raspberry Pi 4 OS will be immediately flashed to your SD card.
Running Android on Raspberry Pi 4
To get Android on Raspberry Pi with emteria’s software, it is not necessary to use complicated flashing tools. Just stick the SD card into your Raspberry Pi 4 and boot it up! Your Raspberry Pi Android OS is now ready to use.
If you’ve ever asked yourself, “Can Raspberry Pi run Android this easily?” then you now have your answer. Yes, it really is that simple.
But before you can start using Android on Raspberry Pi 4, you will need to run through a few initial configuration steps.
To begin, click the “Next” button on your Raspberry Pi device after Android has finished booting up. You will be prompted to select your OS’s language.
After selecting the Raspberry Pi 4 Android OS language, select your time zone on the next screen. After you have connected to the internet, the time zone will keep itself automatically updated.
After selecting the time zone, click next. Your new Android Raspberry Pi 4 will require you to set up a WiFi connection. Click “Setup” to begin this process. (If you are connected to the internet via an ethernet cable, you might not be prompted to set up the WiFi connection.)
To enable WiFi, click the WiFi toggle on the right-hand corner of your Raspberry Pi 4 screen that turns WiFi on or off.
Emteria’s Android on Raspberry Pi 4 version shows you a list of networks that it finds. Click your current location’s WiFi network and then click “NEXT” to configure the Raspberry Pi 4 Android version’s WiFi connection details.
Activating Android on Raspberry Pi 4
After configuring the WiFi, emteria’s Raspberry Pi 4 Android OS will ask if you want to activate a license for this device.
You get one license including three devices for free in the emteria starter plan. Use your activation code!
Activating the device is easy. Simply log in to the emteria account, agree to the End User License Agreement (EULA), and then reboot. Voila!
If you don’t wish to activate your free license for Raspberry Pi Android yet, you can still use the device for free, but it will require a reboot every 8 hours, and there will be an emteria watermark at the bottom right of the device while you’re using it.
Final steps before running apps on Raspberry Pi
You will need to restart Android on Raspberry Pi so that the new configuration options are loaded up when the device boots.
After rebooting, you are officially ready to start using Android on Raspberry Pi!
But if you’re looking for Gmail, Google Docs, or even the Google Play Store to install your favorite apps, you’ll need to do a few more things. Whereas Android is open source, Google does not allow its own apps to be redistributed.
In the next section, we’ll go over how to install Android apps on Raspberry Pi and how to get an app store loaded up onto your new Android Raspberry Pi 4.
To learn more about emteria.OS, check out the emteria knowledge base or download a version of emteria Android for Raspberry Pi for free here.
How to run Android apps on Raspberry Pi 4
Since the Raspberry Pi lacks certification from Google to officially run Google Mobile Services (GMS), there is also no Google Play Store. To install and run apps on Raspberry Pi we will need to find alternative ways.
To install Android apps on Raspberry Pi, you will need to sideload them.
Sideloading means installing an app from an external source, such as from a website or alternative app stores.
Because security is essential, it’s important to only get Raspberry Pi Android apps from stores that implement some degree of malware and security checks.
We recommend using F-Droid.
F-Droid is a fully-fledged app store for the Android platform providing open-source Android apps.
The reason we prefer F-Droid is that it hosts only free and open-source apps. Open-source apps are less likely to contain malicious code because they are vetted by a community of developers.
Additionally, within F-Droid you can add a private repository created within your emteria account to upload your own applications and install them on your Raspberry Pi 4 running emteria.OS. This is especially useful when managing a whole fleet of Raspberry Pis since you are able to update them centrally without manually installing those updates on each and every device.
Learn how to use F-Dorid as a private repository in our knowledge base.
Open the F-Droid app on your Raspberry Pi and search for your favorite apps using the search tool, or browse popular apps in the categories.
You won’t find major apps like Twitter or Facebook on there because these are not open-source. But you are generally safe to download those apps directly from the company’s website as large companies often have versions that can be loaded outside of the Google Play store.
In the F-Droid settings, you can choose to be notified of app updates, if you want those updates to be installed automatically or not, and how often you want F-Droid to check for updates—weekly, daily, every twelve hours, every four hours, or even every hour.
You can also toggle additional repos of apps such as the F-Droid archive, the Guardian Project, or your own private app repository in the settings.
In the privacy section of F-Droid, you can choose to send crash reports and whether you want to include screenshots of crash reports.
Closing notes on Android on Raspberry Pi
Your Android on Raspberry Pi 4 device is ready to use!
The benefit of using emteria.OS is that you will receive regular updates and security fixes whenever they become available. Because your device is rooted, you will also be able to do quite a bit more with the device than with a stock version of Android. The OS is designed in such a way that installing it is easy and doesn’t require complex flashing techniques.
Out now Android 15 for Raspberry Pi 5
Save your free Android OS plan with all features and no time limit — build Android products powered by Raspberry Pi 5.
No credit card required.
Table of contents