The first Raspberry Pi model was introduced in 2012, called Raspberry Pi 1. Although this single-board computer (SBC) was intended as an affordable computing device for schools, it didn't take long for it to become highly popular in the IoT (Internet of Things) sector.
The Pi 1 generation saw several iterations but only graduated to Raspberry Pi 2 in 2015. It was already possible to install Android on Raspberry Pi on Generation 2 devices, but that popularity grew immensely with the Raspberry Pi 3 Android OS.
The Raspberry Pi 3 Android OS was developed for the heavily refined Raspberry Pi 3 generation of devices, the first of which was released in 2016.
The first Raspberry Pi 4 model came out in 2019, making the Raspberry Pi 3 far longer-lived than its predecessor. Android on Raspberry Pi 4 versions were soon ported to create an Android version that could work with this generation of models.
More about Android for Raspberry Pi 3 B+ and other models
The Raspberry Pi 3 Model B+ came out in 2018 and sported several key improvements across the entire device.
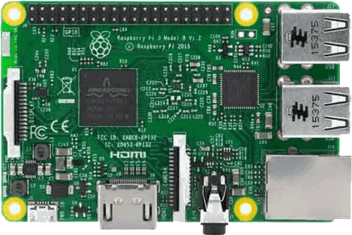
Image: Raspberry Pi 3 Model B+
Raspberry Pi models generally come in the following different flavors:
🍰 A, A+, B, B+, Zero, Compute Module
The Model Zeros are generally the smallest. The Model A and Model B versions are homages to earlier BBC Model A and B microcomputers, which were built for the British Broadcasting Corporation (BBC) in the 1980s. The same is true of the B+ version (an homage to the BBC Model B+).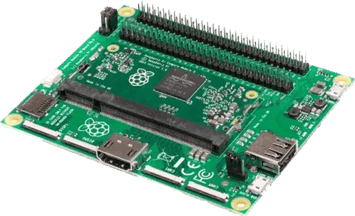
Image: Raspberry Pi Compute Module 3 IO Board
How to run Android on Raspberry Pi 2
There are some minor distributions of Android for Raspberry Pi 2 but these are not nearly as robust or full of features as Android on Raspberry Pi 3 B+ and later versions.
The Raspberry Pi 2 generation also suffers from certain limitations that make opting for the Android OS for Raspberry Pi 3 a better choice. Specifically:
- Generation 2 Pi required a dongle for WiFi or Bluetooth for connectivity. This quickly uses up the available USB ports on the device.
- Generation 3 Pis have a far better clock rate and a more modern CPU architecture.
- The additional functionality in the Generation 3 Pis came at no extra cost to the user, so it makes far more sense to install Android on Raspberry Pi 3 B+ and other Generation 3 models than on the Generation 2 models.
But if someone does want to install Android for Raspberry Pi 2, all that is required is to find a ported version of Android that supports this generation of devices and then to follow similar steps as laid out below for Android on Raspberry Pi 3 B+.
To start running Android on Raspberry Pi 2 B, just find a version of Android ported for this specific device and go through the installation steps to get it going.
Raspberry Pi 3 Running Android
Raspberry Pi 3 was the generation of Raspberry Pis that really started to make sense for running Android on. The additional processing power and generally superior generation of devices make for a far better experience than earlier-generation devices.
There is far more support for Android on various models of Raspberry Pi 3 devices than on earlier generations. Lineage OS Raspberry Pi 3 is one such version of Android for Raspberry Pi 3 devices.
Top 8 reasons why Raspberry Pi 3 B+ Android is a good decision
There are several factors that make installing Android on Raspberry Pi 3 B+ an excellent choice.
These include:
1. Excellent touch screen support
Android on Raspberry Pi 3 B+ has native touch-screen support. Linux distributions use software running on top of the core OS, such as Kodi, to achieve touch-screen support, leading to suboptimal performance because the touch-screen code is not optimized at the OS level.
The touch-screen experience on Android on Raspberry Pi 3 B+ is homogenous with other Android devices, leading to a familiar user experience for people interacting with RPi3 Android.
2. Huge ecosystem of apps
There is a huge selection of apps for Android on Raspberry Pi 3 B+. This means that the user experience can be greatly enhanced by installing existing apps instead of your company needing to invest in further development.
Because of the popularity of Android, these apps are actively developed and updated, so that Android on Raspberry Pi 3 B+ devices remain on par with more mainstream devices.
GMS (Google Mobile Services) is a bundle of apps and APIs that are essential to run the Google Play Store. GSM is not available for Android on Raspberry Pi 3 B+ but the open-source app store F-Droid has a great selection of apps for users to download.
Users can also sideload their own apps, or apps downloaded from official vendor websites.
3. Great developer support
Android on Raspberry Pi 3 B+ has enormous developer support from the overall Android community. Although developers at the OS level are not as numerous, the demand for Android on Raspberry Pi 3 B+ solutions means that this number is growing.
Market research firm EvansData reported that there are an estimated 5.9 million Android developers in the world, compared to less than half that for iOS.
4. Android was built for small devices
The Android OS was built with small-powered devices in mind. Although installing Android on Raspberry Pi 3 B+ requires a special version of Android, ported to work on the Raspberry Pi 3 B+ specifically, the Android OS itself was created with this level of operability in mind from the start.
5. Android is free
The open-source nature of Android on Raspberry Pi 3 B+ means it can be tweaked and modified as needed no matter what purpose it is being used for. Unlike proprietary choices, embedded Android encourages innovation and contributes to an open and competitive marketplace.
6. Remote updates and device management
Raspberry Pi fleet management is made easier when using Android on Raspberry Pi 3 B+ because of its potential support for remote device management. Stock Android provides the APIs necessary to enable Mobile Device Management (MDM) functionality, but it is up to developers to specifically code these functions into any version of Android on Raspberry Pi 3 B+ and to provide a user interface to manage those devices, such as was done for the emteria.OS version of Android on Raspberry Pi 3 B+.
To enable the remote device management features on Android on Raspberry Pi 3 B+ requires:
✔️ A version of Android on Raspberry Pi 3 B+ that has been specifically ported to support MDM functionality (such as emteria.OS)
✔️ A robust backend infrastructure that builds new updates, pushes them to devices, handles security, and so on.
Mobile Device Management is essential in many industries, such as MDM for retail.
7. Familiar user interface
Android on Raspberry Pi 3 B+ has a user interface that is familiar. The user experience is improved because users can get straight in there and operate the device without having to hunt around for menus and features.
8. Excellent support for programming tools
Numerous development environments provide excellent support for Android programming. Many of these tools are open-source and free.
Installing Android on Raspberry Pi 3 B+
Let's look at how to install Android on Raspberry Pi 3 B+. It doesn't matter exactly what model of Raspberry Pi 3 you're using, the following steps will remain the same except for the point where you select the target device.
What you need
To install Android on Raspberry Pi 3 B+, you will need the following:
✔️ Raspberry Pi 3 B+
✔️ An SD card of at least Class 10 or higher (UHS). Type A1 cards are best. The Raspberry Pi 3 doesn't support certain cards. You can compare the SD card you choose with this comprehensive list.
✔️ A Linux or Windows computer so you can flash the Android Raspberry Pi 3 image onto the SD card.
✔️ A ported version of Android on Raspberry Pi 3 B+ that has been tested to work with the device.
Step 1: Choose an appropriate Android version
Android doesn't work on a Raspberry Pi 3 B+ out of the box so you will need to find a version that was specifically designed for this or develop it yourself. Fortunately, there are a few ones around such as Lineage OS and emteria.OS.
For this tutorial, we will be using emteria.OS.
Step 2: Download the emteria OS installer
Depending on what operating system you're using (Linux or Windows), you will need to download the respective installer for Android on Raspberry Pi 3 B+. The easiest way to figure out which version to use is to read our detailed tutorial on it.
Step 3: Select between the stability levels
When the installer starts running, the emteria login page pops up. Fill in your login details (email and password) to be shown the list of target devices.
Select between the stability levels: Live, Beta, or Nightly. We recommend selecting either Live or Beta. Choose Raspberry Pi 3 B+ as the target device and your OS version, and click Continue.
Step 4: Flash the emteria.OS
The emteria installer will now prompt you to select the SD card you want to flash the operating system onto. Choose the drive for the SD card you inserted and proceed with the flashing step.
This step can take a few minutes.
Step 5: Insert the SD Card into the Raspberry Pi 3 B+ device
It is only necessary to insert the newly flashed SD card into the Raspberry Pi 3 B+ device to start running Android on Raspberry Pi 3 B+. No further complicated flashing tools are needed. The entire operating system runs from the SD card.
Step 6: Configure the new Android installation
After booting up, you will be presented with basic configuration options such as the WiFi connection details, OS language, and time zone. After filling these in, it is necessary to activate your version of Android on Raspberry Pi 3 B+.
Step 7: Configure an app store
To get apps on Android on Raspberry Pi 3 B+, it is necessary to install an open-source app store such as F-Droid.
Full instructions on how this can be done can be found in our detailed article on installing Android on Raspberry Pi 4.
Updating the Raspberry Pi 3 Android Image
Updates are essential to maintain the security of Android on Raspberry Pi 3 B+.
Emteria provides updates out of the box for its version of Android on Raspberry Pi 3 B+, so it is only necessary to configure these updates on your device or via MDM.
Manually updating Android on Raspberry Pi 3 B+
If you have chosen manual updates on Android on Raspberry Pi 3 B+, do the following to update your device:
- Make sure your device is connected to the internet.
- Open up the Emteria Settings app on your Raspberry Pi 3 B+ device.
- Click on System Options and then on Check for Updates.
- If an update is available, click the DOWNLOAD button in the bottom right
- Wait while the Android on Raspberry Pi 3 B+ update image downloads. The time for this will vary depending on the speed of your internet connection.
- Once the download has been completed, click the red Install button in the bottom right of your device's screen.
It's as easy as that to update Android on Raspberry Pi 3 B+ manually!
Automatically updating Android on Raspberry Pi 3 B+
To configure updates to happen automatically on your Android on Raspberry Pi 3 B+ device, do the following:
- Open up the Emteria Settings app on your device.
- Click on System Options and then on Update Settings.
- In that section, there's a menu item that says "Check automatically: Enable periodic checks for new versions." Change the toggle so this is ON.
- Underneath that menu item, there is a Stability Level menu item. You can change the setting here from Live, Beta, or Nightly builds. We recommend selecting either Live or Beta.
- Scroll further down and select Schedule Updates. This is where you can select the preferred times for your scheduled updates.
- First, select the days on which you would want updates to happen. Next, click the Select earliest update time to select the earliest that you would want updates to be allowed on the device.
- To get the Automatic updates running, you need to explicitly enable this in the Schedule automatically section.
- You can also schedule an update to happen at a specific time and date by clicking on the No system update scheduled tab.
- Whenever an update is available, a dialog will pop up informing you. Although the update is scheduled automatically, you still need to manually click the Update button to execute it. If you don't wish to run that particular update at that time, click Cancel.
- If you click Update, the new version of Android on Raspberry Pi 3 B+ will start downloading. The device will need an active internet connection to finish the download process.
- There is no need to interact with the device after that. It will download the update automatically, install it, and then reboot.
Updating Android on Raspberry Pi 3 B+ remotely via MDM
Using Emteria's Device Hub, it is possible to schedule automatic updates using MDM. This has the advantage that you do not have to set up automatic updates for each device separately and you do not need physical access to your devices.
Here is how to set it up:
- After logging in to the Device Hub, navigate to the Management section.
- Select the device or a group of devices you want to configure for automatic updates.
- Select the Commands tab and click Add. This allows you to add any number of commands. In our case, we're going to add an Update command.
- In the Editor of the command, select the JSON option. Type in this code, changing the scheduled_version to the version number you want to install, and the scheduled_timestamp to whatever date you want the update installed on.
- Click the Save button to save your JSON, then on the Create button to activate the command.
After rebooting, the changes will take effect!
The Easiest Way to Install Android Raspberry Pi 3
Android is an excellent choice for installing on Raspberry Pi 3 B+ because of the great user experience the OS has. But to install Android on Raspberry Pi 3 B+, you need a version that has been specifically ported to work on this device.
Emteria.OS not only supports Raspberry Pi 3 B+ out of the box, but it also comes with regular updates that keep your Android version secure.
There is a free tier and a paid tier for emteria.OS, depending on what you need your device for.
Power your Raspberry Pi with Android
Save your free Android OS starter plan with all features and no time limit — build Android products powered by Raspberry Pi.
No credit card required.
Table of contents
.png?height=230&name=blog-header(49).png)